Tutorial
Quick Start Guide
In this tutorial we provide instructions for getting started with the setup of your new Organic Theme.
1. Download Your Theme
Products can be downloaded at the time of checkout, or from within your Organic Themes account. Themes and plugins will be downloaded in the form of .zip file, and they should not be unzipped before installation. Make note of the location in which the .zip file was saved on to your computer for future reference.
2. Install Your Theme
Login to the WordPress dashboard for your website (i.e. http://mydomain.com/wp-admin/). Next, follow these instructions to install your premium WordPress theme:
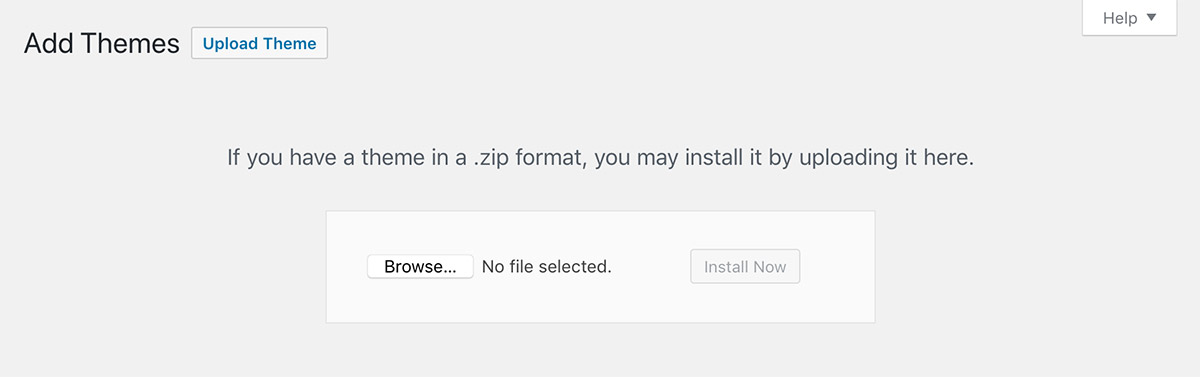
- Navigate to Appearance > Themes within the WordPress admin.
- Click Add New at the top of the page.
- Click Upload Theme at the top of the page.
- Select your downloaded theme .zip file to upload.
- Click the Install Now button.
- Activate the theme.
3. Enter Theme License
Upon theme activation, we highly recommend activating your theme license. An active license is required to receive theme updates for new features, functionality, bug fixes, and keeping the theme secure. Add your theme license by following these instructions:
- Copy the theme license from from your Organic Themes account.
- Navigate to Appearance > Theme License within the WordPress admin.
- Enter your license key.
- Click the blue Save Changes button.
- Click the Activate License button.
Upon a successful theme license activation, you should see that you license is active, when the license expires, and how many licenses you have remaining, similar to the screenshot below.

4. Recommended Plugins
Upon theme activation, you will be prompted to install and activate recommended plugins. All recommended plugins are free, but premium versions may be available. The plugins are not required for basic theme usage. However, they may be required for adding some types of content and/or functionality to the theme as displayed in the theme demo. Additionally, if you intend to install the demo content outlined in Step 5, activating the recommended plugins is required in order for the theme to appear like the demo.
Common recommended plugins for Organic Themes include:
Organic Builder Widgets
Plugin Link | Pro Version | Setup Instructions
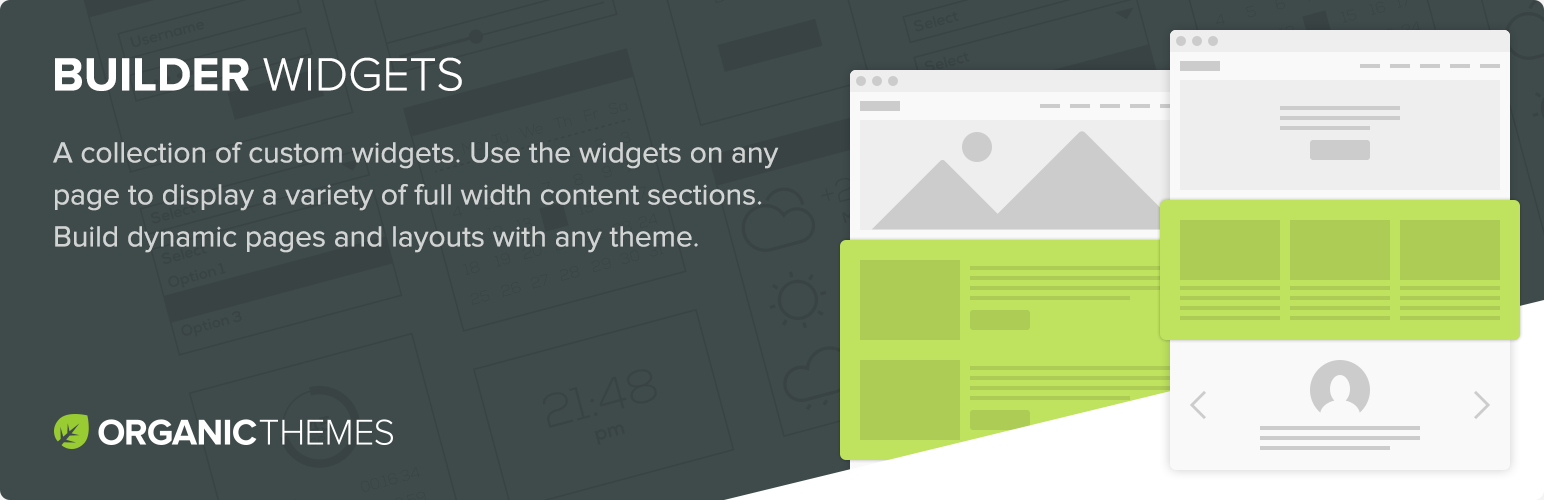
Builder Widgets is the free version of our WordPress page builder. The plugin provides capability for creating custom page designs within the WordPress Customizer. As a result, you can build unique home pages, landing pages, sales pages, and more. Additionally, you can upgrade to Builder Widgets Pro for many more options and widgets.
Organic Profile Block
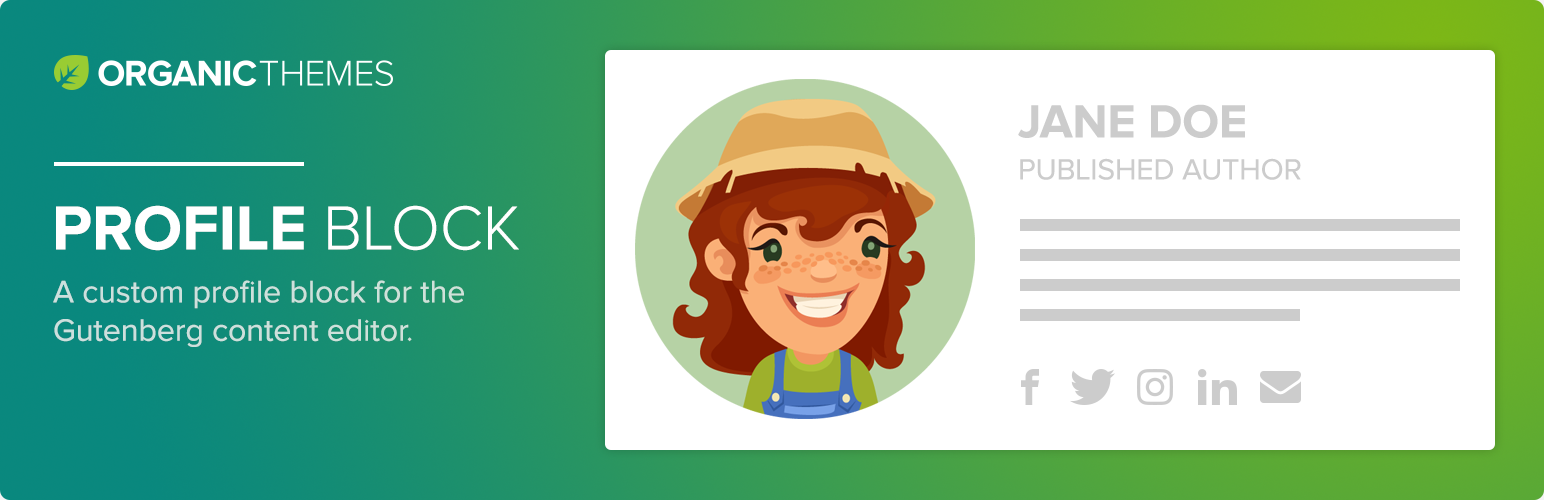
The Organic Profile Block provides the capability to add a personal profile section within the WordPress 5.0+ Gutenberg block editor. As a result, it’s perfect for adding author profiles, team members, testimonials, and more.
Organic Custom Content
The Organic Custom Content plugin is required to power the “Tour Dates” feature within certain themes, such as Music and Entertainer.
Jetpack
The Jetpack plugin was developed by Automattic — the corporate entity behind WordPress. The plugin adds many useful features to your website, including an image CDN, social sharing buttons, Markdown, lazy loading, and much more. Organic Themes utilizes the plugin for the Portfolio and Testimonial custom post types. Additionally, the Jetpack Featured Content feature has been integrated into our themes for adding featured content slideshows. Also, many of our themes are compatible with the Jetpack Infinite Scroll feature. As a result, we highly recommend the usage of the plugin with Organic Themes.
Jetpack is free to use. However, some premium features are paid, and the plugin requires registration with a WordPress.com account. Also, if you are using the plugin in a local environment, the plugin must be used in development mode.
WooCommerce
Plugin Link | Premium Extensions
WooCommerce is the most popular eCommerce solution for WordPress. The plugin adds functionality for creating a shop on your website. While it’s free to install and use at a basic level, many features require the purchase of extensions. All premium Organic Themes are compatible with WooCommerce.
One-Click Demo Import
The One-Click Demo Import plugin is integrated within many of our themes to make the installation of demo content simple. Using the plugin requires the activation of all recommended plugins before importing content. If the plugin is not recommended with your particular theme, you will need to add demo content following the instructions in Step 5.
5. Install Demo Content (Optional)
By default, content is not added upon theme activation. This is the case with virtually every WordPress theme because many users have existing content. However, if you are new to WordPress and/or Organic Themes, you may want to install the content displayed within the theme demo to use as a guide. You can do this yourself, or we can do it for you with our Theme Setup Service. There are two ways you can install demo content on your site:
Traditional Demo Content Install
- Download the demo content file from within the theme documentation or your account.
- Unzip the downloaded file.
- Navigate to Tools > Import within the WordPress admin.
- Click the Run Importer link for WordPress at the bottom of the page.
- Install the WordPress Importer plugin if prompted.
- Upload the .xml demo content file downloaded from our site.
- Click the blue Upload file and import button.
- Follow the prompts, and wait for the installation to complete.
- Setup the theme as outlined in the documentation and Step 6.
One-Click Demo Import
If the One-Click Demo Import plugin is recommended upon theme activation, install and activate the plugin along with all other recommended plugins. Then, follow the instructions below:
- Navigate to Appearance > Import Demo Data within the WordPress admin.
- Click the blue Import Demo Data button.
- Wait for installation to complete. It may take several minutes.
Note: The One-Click Demo Import plugin should also import the Customizer settings and Widgets from the theme demo. However, some setup may still be necessary within the WordPress Customizer.
6. Setup Your Theme
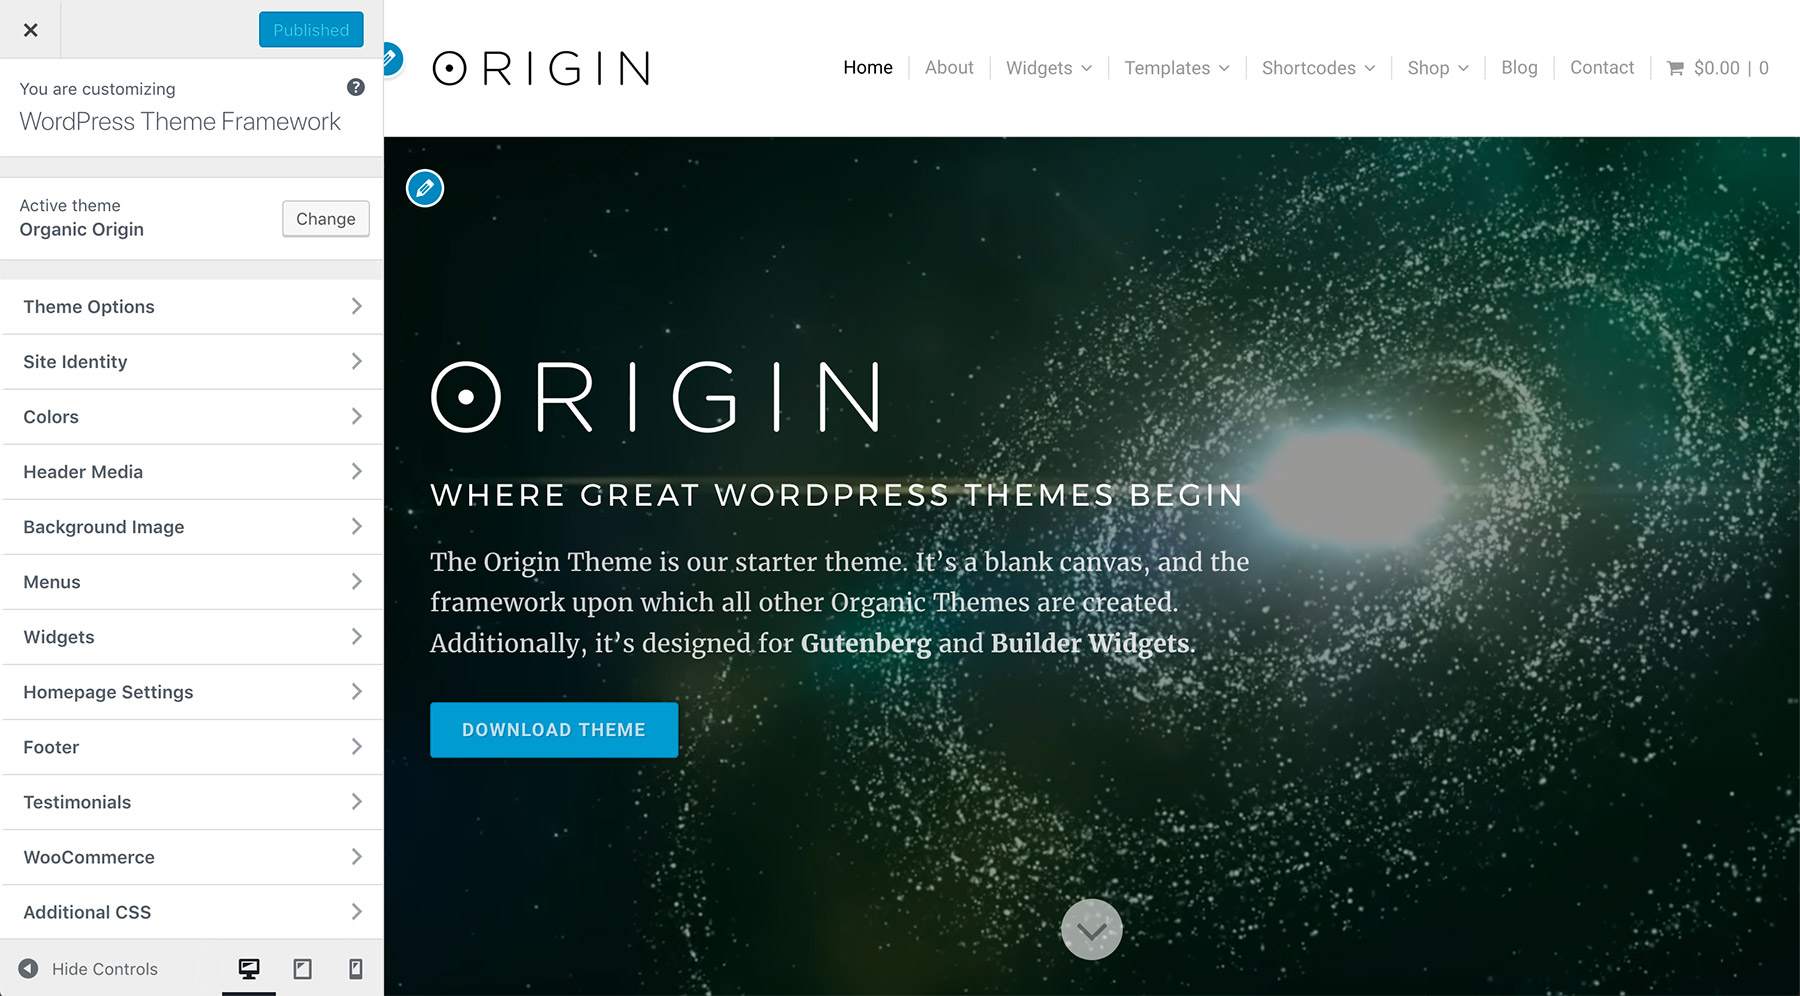
Once your theme has been installed and activated, it’s time to setup the theme options. All options for Organic Themes are located within the WordPress Customizer.
Home Template Setup
Most Organic Themes include a Page Template for the home page layout. In order to setup the home page, you will first need to create a page following these instructions:
Create Home Page
- Navigate to Pages > Add New within the WordPress admin.
- Add “Home” as the page title.
- Within the Page Attributes section of the Document settings on the right, choose the “Home” template.
- Publish the page.
Homepage Settings
- Navigate to Appearance > Customize > Homepage Settings within the Customizer.
- Select the radio button for “A static page” within the display options.
- Within the Homepage select box, choose your recently published “Home” page.
- Navigate to Appearance > Customize > Theme Options to set the home page template options.
- Publish the changes in the Customizer.
Note: Older themes may have a home.php file included with the theme. In which case, the Homepage settings must display “Your latest posts” for the home page to display properly.
Blog Setup
If you’re using a fresh installation of the WordPress platform, the Homepage settings will be set to display “Your latest posts” by default. As a result, the theme’s blog layout will display on the home page upon activation. However, if you chose to setup the home page template as per the instructions above, you will need to setup the blog on a different page. This can be accomplished following these instructions:
Create Blog Page
- Navigate to Pages > Add New within the WordPress admin.
- Add “Blog” or your desired name as the page title.
- Publish the page.
Note: There is no need to add any content to this page. It’s simply a placeholder for displaying your latest posts.
Homepage Settings
- Navigate to Appearance > Customize > Homepage Settings within the Customizer.
- Within the Posts page select box, choose your recently published “Blog” page.
- Publish the changes in the Customizer.
Additional Page Templates
Organic Themes include a variety of Page Templates for various purposes, such as portfolios, testimonials, slideshows, and other page types. Please refer to the Using Page Templates tutorial for further guidance.
7. Create Custom Menus
In order to display your website navigation links, you will need to create a Custom Menu within WordPress. Custom Menus are displayed in a variety of locations defined within your theme. However, Organic Themes generally display menus within the header and footer of your website.
The Main (or Header) menu is used to display links to other pages, posts, and categories within the header of your website. Meanwhile, the Social menu is used to display links to your social media profiles, typically within the footer. Custom Menus can be created and managed for your website by following these instructions:
Main Menu Setup
- Navigate to Appearance > Menus within the WordPress admin.
- Add a Menu Name.
- Click the blue Create Menu button.
- Proceed by adding your desired Pages, Categories, and Custom Links to the new menu.
- Organize the menu by dragging and dropping the links to the desired locations.
- Select the Main Menu “Display location” within the Menu Settings.
- Click the blue Save Menu button.
Social Menu Setup
- Navigate to Appearance > Menus within the WordPress admin.
- Add a Menu Name.
- Click the blue Create Menu button.
- Proceed by adding Custom Links to your social media profiles to the menu.
- Organize the menu by dragging and dropping the links to the desired locations.
- Select the Social Menu “Display location” within the Menu Settings.
- Click the blue Save Menu button.
Note: Custom Links to social media websites will display as icons within the Social Menu location on your website. If your social media link is not displaying its associated icon, it may be because that particular social media service is not supported by the theme. You may request the addition of more social media icons within our support forums. However, we can’t guarantee the addition of icons for less popular social media services.
Helpful Links
The following links are helpful for learning more about your theme, and the setup process. Please use the support forums for theme related questions.
- Support Forums
- Theme Setup Service
- How To Use Builder Widgets
- WordPress Tutorials
- Theme Documentation