Tutorial
Create A WordPress Custom Menu
Your pages should already be displayed within the navigation menu on your site. However, they may not be in the order you desire. So, let’s create a custom menu!
Similar to widgets, you can create custom menus that can be applied to various locations in your theme. There are generally 2 menu locations:
- Header Menu (or “Main” Menu) — For displaying your main site navigation.
- Social Menu — For adding links to your social networks.
Menus can be created under Appearance -> Menus, or within the Customizer. Since you should still be within the Customizer after saving your theme options, let’s create the menu there. Navigate to the top level of options by clicking the back arrow within the Customizer (Not the back arrow of your browser!):
- Select the “Menus” panel.
- Click the “Add a Menu” button.
- Add a name for the custom menu, like “Main Menu.”
- Click the “Create Menu” button.
- Click the “Add Items” button.
- Add Pages to your menu.
- Drag the Pages into the order you desire.
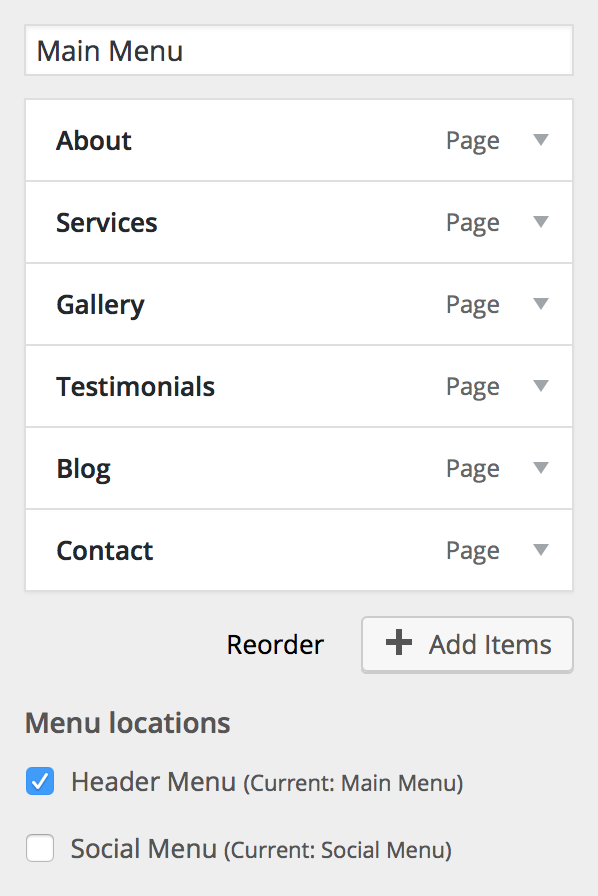
- Check the “Header Menu” location.
- Click the blue “Save & Publish” button.
In addition to pages, you can add other items to you menu such as Categories and Custom Links. Your menu should look similar to the example image above.
 The “Social Menu” displays links with icons to your social media profiles. The menu is created similarly to the main navigation menu. However, instead of adding pages to the menu, you will be adding Custom Links. Custom links in the social menu should look similar to the example image on the left. The theme will automatically detect which link has been added to the menu and apply the appropriate icon. In addition to social media icons, adding a link to Google Maps will display a location icon, and an email link will display a mail icon. Here’s how to create a social media menu:
- Within the WP Admin, navigate to Appearance > Menus
2. Click the “Create A New Menu” link. Give your menu a name, like “Social Menu”; click the blue “Create Menu” button
3. Select your social menu under the “Edit Menus” tab
4. Under “Custom Links”, paste the URL for your social media pages, then click “Add To Menu” for each one
5. Check the “Social Menu” box next to “Display location” under Menu Settings. Click the blue “Save Menu” button
Note: To have social media links open pages in a new tab, select “Screen Options” and check the box that says “Link Target”. Then, within each social media tab (under the URL) you’ll see a box to check that says “Open link in a new tab”. Just check that box and save.