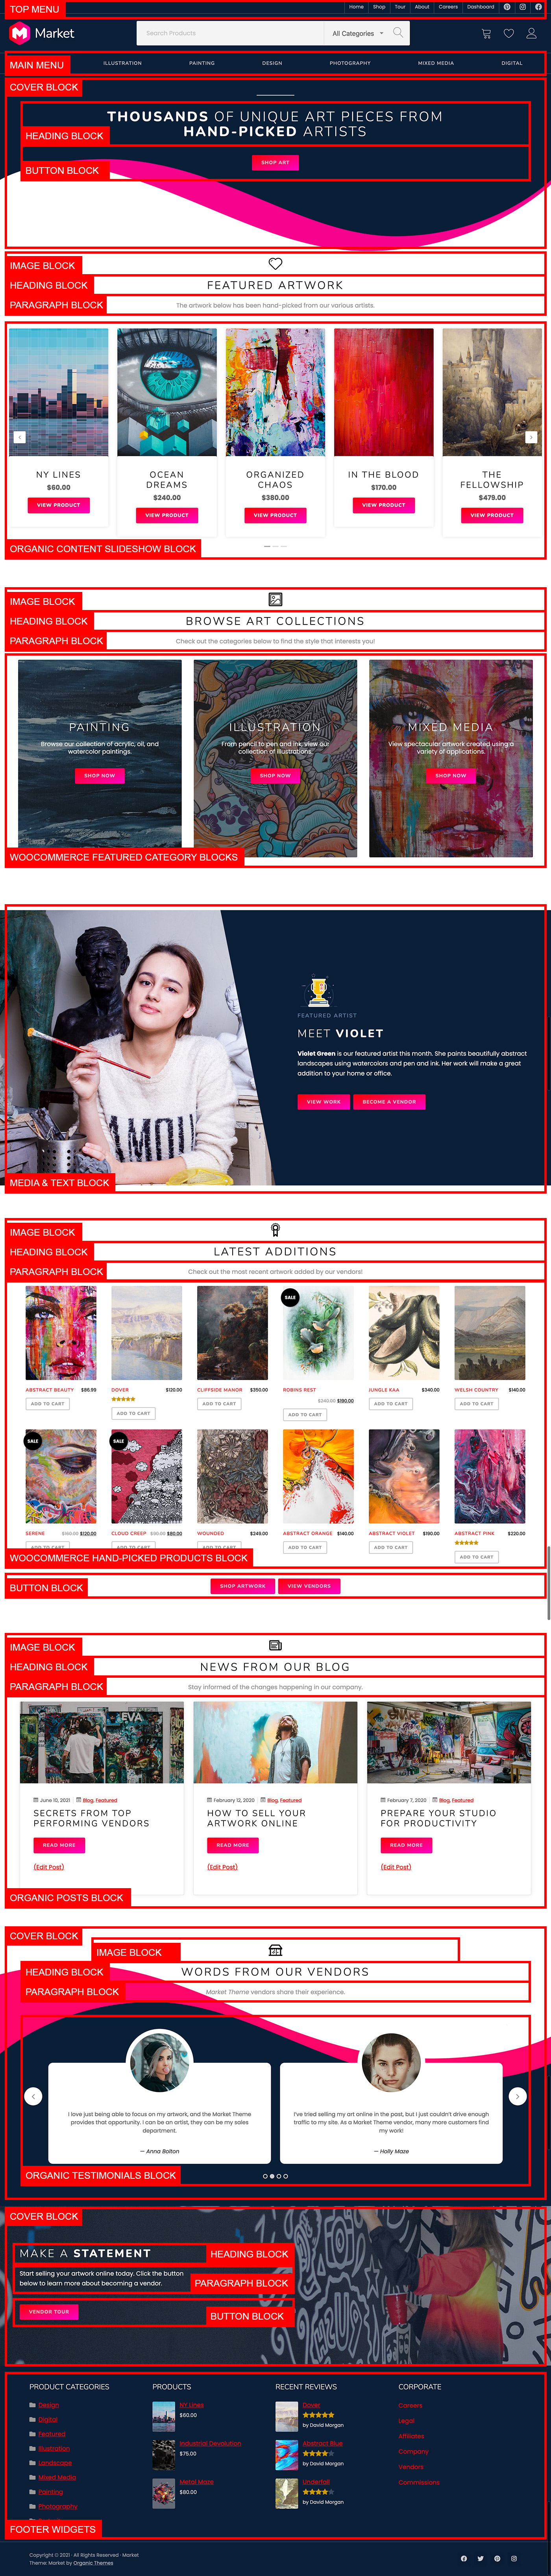
Documentation

Marketplace Theme

General Setup

Installation

To install the Market Theme you must first have a working WordPress(.org) installation. For information on installing WordPress, please see Installing WordPress, from the WordPress Codex. Once WordPress has been setup in your hosting environment, you can install your theme one of two ways:

FTP upload: download and un-zip your theme folder, and using the FTP program of your choice upload the theme folder to the ‘../wp-content/themes/’ folder on your server.

WordPress dashboard:

  1. Download the theme from your account.
  2. Sign into your WordPress dashboard (e.g., yourdomain.com/wp-admin).
  3. Navigate to Appearance > Themes > Add New > Upload, and select your zipped theme folder.
  4. Click “Install Now”.
  5. Once the theme is uploaded you will need to activate it, either with the provided link or under Appearance > Themes.

Note: If you use Safari as your primary browser you may find that your theme folder is not zipped after downloading it. You will need to re-compress your theme folder before initiating the second installation process.

Theme License

A theme license allows you to have access to ongoing theme updates. By applying the theme license, you will see automatic notifications for all future theme updates in the Appearance > Themes section of the dashboard – this makes updating the theme very easy! If you have not yet applied a license key to your site, please do so by logging into your Organic Themes account and navigate to the Account > Licenses page in order to retrieve the theme license. Copy the license key and apply it within the WordPress dashboard section under Appearance > Theme License. Paste the license key in the license field, and click the “Save Changes” and then “Activate License” buttons.

Plugins

The Organic Blocks Bundle plugin may be used to create unique content sections on any page using a variety of custom blocks. Instructions for using the plugin can be found here. The plugin is a requirement if you wish to install the demo content exactly as it appears in the demo.

WooCommerce is required if you wish to use the eCommerce portion of the theme. Additionally, the Dokan Lite plugin is necessary if you wish to activate the multi-vendor functionality of the theme.

Note: The contact form is powered by Gravity Forms, an excellent premium WordPress contact form plugin (free alternatives include ‘Contact Form 7’ and ‘Jetpack Forms’).

Image Dimensions

Theme defined image dimensions are as follows (these can be found in the ‘Theme Setup’ function at the top of your functions.php file):
  • Logo: 320 x 320px
  • Market Featured Large: 2400 x 1800px
  • Market Featured Medium: 1200 x 1200px

Demo Import

Demo content can be installed using the One-Click Demo Import plugin. As a result, the theme will display the content, layout, and options seen in the theme demo. To install the demo content, perform the following steps.

1. Install and activate all recommended plugins.
2. Complete any initial setup wizards for WooCommerce or Dokan.
3. Navigate to Appearance > Import Demo Data.
4. Click the blue “Import Demo Data” button.
5. Process may take a few minutes to complete.

Custom Menus

You can setup and manage your menu under Appearance > Menus, in your WordPress dashboard. The theme utilizes 5 custom menus; the Top Menu, Main Menu, Mobile Menu Large, Mobile Menu Small and a Social Menu for displaying social media icons in the lower right corner of the footer. See the Codex for an explanation of the custom menu system (Note: this tutorial is for WordPress.com, but the process is the same).

Home Page Setup

The home page in the Market Theme demo is created using a combination of WordPress, WooCommerce, and Organic blocks. The legend below outlines the blocks that were used on the home page demo. You can manually recreate the demo layout by adding the blocks in the legend. Otherwise, you can import the demo content and edit the blocks as seen in the demo.

Please note: If you choose to import the demo content, all necessary plugins must be installed and activated first.


Theme Options

Font Pairings

The theme provides options for selecting from hand-picked font pairings. To change the fonts, navigate to Appearance > Customize > Theme Options > Fonts within the WordPress admin.

Display Options

The theme provides the following display options within the WordPress Customizer:

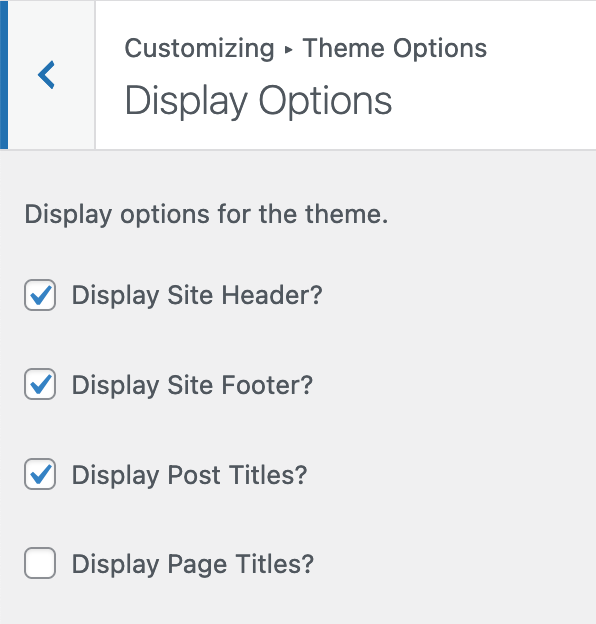
Display Site Header?: Within the Appearance > Customize > Theme Options > Display Options, the theme features the option to display or hide the default theme header.

Display Site Footer?: Within the Appearance > Customize > Theme Options > Display Options, the theme features the option to display or hide the default theme footer.

Display Post Titles?: Within the Appearance > Customize > Theme Options > Display Options, the theme features the option to display or hide post titles.

Display Page Titles?: Within the Appearance > Customize > Theme Options > Display Options, the theme features the option to display or hide page titles.

Additional Theme Options

In addition, the theme provides the following options within the WordPress Customizer:

Logo Resizer: Within the Appearance > Customize > Site Identity options, the theme features the option to upload and scale a logo image to the size of your liking.

Title Font: Within the Appearance > Customize > Site Identity options, the theme features the option to change the Site Title font from a list of hand-picked Google Fonts.

Site Identity: Additionally, within the Appearance > Customize > Site Identity options, you may choose to toggle the display of your Site Title and Site Tagline.

Colors: Within the Appearance > Customize > Colors options, you can optionally choose different colors for the menu background, header background, and various link colors.

Shop Page

WooCommerce

Please see WooCommerce documentation for help with using WooCommerce: http://docs.woothemes.com/documentation/plugins/woocommerce/