5 Steps To Create A WordPress Website For Beginners
We break down the process of building a WordPress website into 5 simple steps.
Many of our customers are designers, developers and bloggers already familiar with the basics of creating a website. However, we also encounter a number of website virgins — creating a WordPress website for the first time. They are completely unfamiliar with the process.
For newcomers, there is an overwhelming amount of information surrounding the topic. Most of it is confusing rubbish. In reality, there are essentially 5 steps to creating a professional, self-hosted WordPress website. I’m going to dispel any myths about the difficulties of creating a website. So, let’s get started.
1. Register A Domain Name
It’s easy to think about a website in terms of real estate. A domain is your address. It’s how people on the internet will find you.

The cost of a domain varies — usually around $12/year for an unregistered generic TLD such as .com, .net, .org and .info. Domain names can be reserved through a registrar, such as Name.com, or a hosting company, such as GoDaddy.
Securing a good domain name is a task unto itself. Unfortunately, there is a high probability the name you want is already registered. So, you may need to get creative and have some backup names in mind.
Generally, the shorter and more memorable the domain, the better. For example, my name is David Morgan. It’s a very common name. My name was registered to a company that sells southwestern apparel. So, I had to get creative. The domain “idmorgan.com” was available. Since I also produce identity design, the name worked on multiple levels. I registered it, then created a subdomain for that domain. So, my website address is dav.idmorgan.com.
If you need to get creative, Domai.nr is a great registrar for finding unique domain names. Using unique TLDs, subdomains and thinking outside the box will eventually score you a short and memorable name worthy of your business card. Be patient. It takes time.
Registering a domain with your desired hosting provider can be a good idea. It makes managing the domain easier and transparent for beginners.
Personally, I have a collection of domains. When I get an idea for a project or product, I’m likely to register a new domain. Having domains separate from your host has its advantages as well — particularly if you want to change hosting providers. In my case, I use Hover.com. I love their service. The interface makes it simple to manage several domains. Also, should I choose to change hosting providers, it’s simple to point my domain to a new host. Which brings me to the next step.
2. Choose A Hosting Provider
In real estate terms, hosting is the land where your house resides. Like a domain, it is a necessity for your website. We have had customers tell us they want to keep their website, but cancel their hosting. Unfortunately, it doesn’t work that way. You can’t remove the land from underneath the house.
In literal terms, acquiring web hosting is the process of renting space on server hardware where the data for your website will be stored.

Hosting varies considerably in price and quality. It can be the difference between Baltic Avenue and Boardwalk in the game of Monopoly. We spend over $2,000 per month on hosting. Google has teams of employees devoted to hosting, and probably spends hundreds of thousands per month.
Generally, the more you pay for hosting, the faster and more secure your website will be. So, with a good hosting provider, your website will be less likely to be infected with malware or experience significant down time.
For your first website, you can expect to pay anywhere from $5 to $50 monthly, depending on your desired experience. When purchasing hosting, you are literally renting space on a server for your website files to reside. Additionally, you are paying for the security, speed, reliability, and management for your website.
Hosting features vary as much as the prices. For your first site, you probably won’t need a great deal of bandwidth and file storage space. So, we recommend starting with the cheapest option, and upgrading as needed when your site grows.
Additionally, we recommend securing an SSL certificate through your hosting provider. An SSL certificate is a necessity if you plan to sell products or accept donations on your website. However, it’s also a factor among search engines like Google for determining the ranking your website. So, for that reason alone, we recommend a certificate regardless of whether or not you plan to accept transactions on your website.
Based on our personal experience with many hosting providers, we recommend the following companies. Please note, these are NOT affiliate links. We’re not trying to make money from you by recommending these providers. They are simply our favorite hosts to work with after many years of operating an online business:
All the options listed above are managed WordPress hosts. While a managed WordPress host isn’t a necessity, it makes the hosting process much easier to understand for beginners. Plus, they usually won’t nickel and dime you for other services your website doesn’t need.
After signing up with your chosen hosting provider, you will need to install a website content management system (CMS) on your server. This is the software responsible for publishing and managing the content of your website. Of course, we recommend WordPress.
3. Install WordPress On Your Site
Continuing with the real estate analogy — WordPress is the foundation, frame, plumbing, wiring, and roof of your website. It’s structure that makes building the rest of your site fun and easy.
A content management system (CMS) is software for managing your website — similar to using OSX on your Apple, or Windows on your PC. A good CMS allows for the creation and management of pages, blog posts, navigation menus, content, and much more with ease.
There are many CMS options for managing websites. Sparing the confusion, WordPress is arguably the best website CMS available. The platform is open source, extremely powerful, secure, user friendly, and best of all — it’s completely free. What began as a simple blogging platform has evolved into a powerful tool for creating any kind of website. In short, WordPress is awesome.
Thousands of talented designers and developers have contributed to development of WordPress by improving the core software, creating themes, plugins, services, and more. It has been constantly tested and improved over the course of several years by millions of users. It’s used by single moms and fortune 500 companies alike. WordPress currently powers over 50% of all websites that use content management systems. When taking into consideration how many websites exist on the internet, that number is massive — over 74.6 million websites. Just take a look at how many times the latest version of WordPress has been downloaded.
Just because WordPress is powerful, doesn’t mean it’s incredibly simple. While it is very user friendly, it will require some effort to familiarize yourself with the platform. Like any new software, there is a learning curve involved.
It’s not magic. WordPress does not build your website for you. It won’t read your mind. It’s a vehicle for adding content, images, functionality, changing the appearance of your website and more. The possibilities are endless with WordPress, but don’t let that overwhelm you.
In order to install WordPress on your web server, you’ll need to have completed Step 2. If you chose one of the managed WordPress hosting providers listed above, good on you. The software should already be installed on your server. Otherwise, you will need install WordPress on your server through other means, like Softaculous or the Famous 5-Minute Installation.
4. Pick Your Website Appearance
WordPress Themes control the appearance of your site. In real estate, a WordPress theme is the paint on the walls, the type of flooring, landscaping, etc. It’s the presentation of your content — what people see when they visit your site.
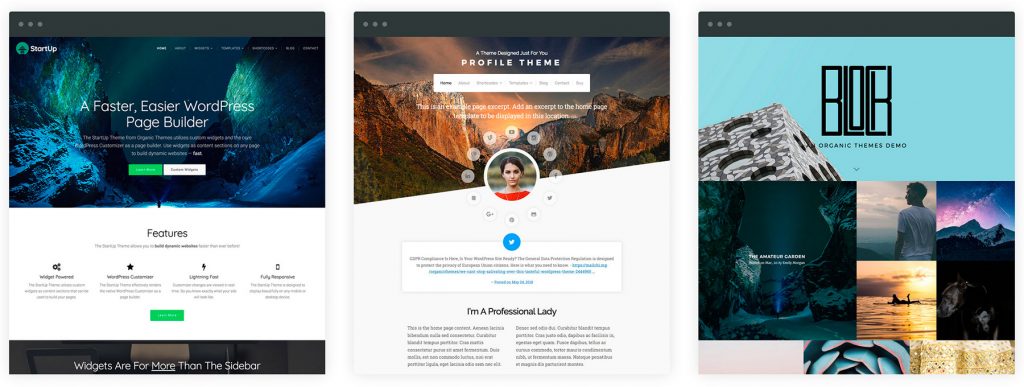
Literally, a WordPress theme is a bunch of HTML, CSS, PHP and Javascript files designed and coded to hold WordPress content. There are no shortage of themes available for WordPress. We offer a wide variety of themes, featuring modern designs and all the functionality you need to create a website of your very own. Visit our Themes page to choose from our wide selection of premium themes.
When we started Organic Themes in 2009, we were one of the few companies offering “premium” commercial themes. Since then, the theme market has grown considerably. We have been fortunate enough to partner with WordPress.com and remain one of the top WordPress theme providers in the industry.
Choosing a theme is a matter of needs and personal preference. It’s the most artistic piece of the website process — and also the most subjective. Some people change themes like they’re changing clothes. I used to re-design my theme every couple months — hence the reason I became a theme designer and developer.
We often receive questions like, “Should I choose the Startup Theme or Natural Theme?” If both themes suit your needs, then simply choose the one you like more.
Despite themes being subjective, there are a few factors that make a theme great. It boils down to great organization. Organization of the design, code and theme files. Everything on top of that is just fluff — or as we like to call it, added hormones.
In terms of installing a theme, WordPress has made this an easy process. Free themes can be installed from within the WordPress dashboard, while premium themes can be uploaded as a .zip file. We’ve provided theme installation instructions here.
The setup process for a theme varies, depending on your chosen theme. In the case of Organic Themes, we believe that less is more, and the setup process should be simple. For that reason, we don’t overwhelm the user with countless options. Instead, we provide a simple setup process that can all be accomplished within the WordPress customizer. The customizer provides the ability to see your changes in real-time as you’re setting options. As a result, there is no guesswork involved.
Now, you should have a website with WordPress and a theme installed. Next, is the most time consuming process of all — adding your content.
5. Add Your Content
The content is the most important part of your website. As the saying goes, content is king. It is the furniture in your house, the food in your fridge; what makes your space habitable.
It’s a common misconception among first timers that the purchase of a theme includes the content seen in the demo. In our case, we offer the demo content as a separate option that may be installed. However, content is not installed with the theme. Content is independent of a theme. Many WordPress users have existing content, and installing a theme that creates additional content is very undesirable.
Demo content is great to use as a guide. However, it should be removed in place of your real content as soon as possible.
Content within WordPress is added several ways. Most commonly, through the creation of Pages and Posts.
Pages are static content. That is, content that doesn’t change often, and resides in a fixed location on your site. For example, an “About” page explaining your business is a great example of a page.
Posts, on the the other hand, are dated informational articles pertaining to a certain topic. For example, blog articles or press releases would be added as posts. Posts are displayed in chronological order, with the most recent posts at the top.
Content can be added to your WordPress site through other means as well. For instance, custom post types are included with some plugins and themes, and provide a way of adding unique content types, such as tour dates or food menu items. Additionally, content can be added in the form of Widgets. For example, our Builder Widgets plugin allows for the creation of dynamic pages featuring multiple types of content sections — like slideshows, testimonials, team members, events, and more.
The content is up to you. There is an art to writing great content, organizing your pages and using great images. Poor content and images will make the difference between an amateur site and a professional one. It’s a mistake I see all too often. We have written an article of 5 tips to creating beautiful content here.
That’s It!
As we say in Hawaii, “All pau!” I hope this article proves helpful to anybody navigating the waters of building a website for the first time.
Obviously, we sell products to help you along the way. However, we are a small company and our satisfaction comes from helping others achieve a professional presence on the web. It’s what motivates us to keep producing and improving our products.